While a clean install is not always necessary, slightly better stability and performance can be expected when XP is installed to a clean hard drive or partition.
1. Check system requirements - Microsoft's minimum requirements for Windows XP are a Pentium 233 MHz processor and 64 MB of RAM. I find this to unrealistic, however, and believe you'll get the best performance with a 500 MHz or higher CPU and 256 MB of RAM or more.
(no need to worry if you have Processors like intel pIII,pIV, dual core,core 2 due or in amd sempron ,athlon phenom) these all are more then requirment
2. Make sure your hardware and software is compatible -just check that do you have cd-rom device & you have bootable cd of windows xp.
3. Make sure you can boot with your CD drive - Don't you whether you can or not just insert bootable cd in drive and restart it if you get massage like press any key boot from cd\dvd.
(if you dont find this massage you need to set first boot device to cd rom/dvd for info about it check another post named "bios setup")
4. Consider upgrading your BIOS - ,YOU may be need to upgrade your bios if you are using an old pc. you can download BIOS upgrades from the Web site of the company that made your PC or motherboard.
OK, let's clean install XP.
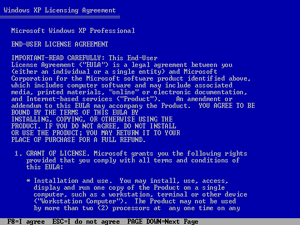
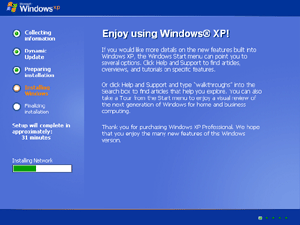
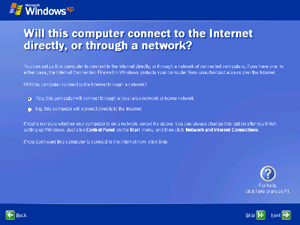
Step-by-Step: Clean installing Windows XP (Interactive Setup)
Installing Windows XP is a straightforward process, with few interactive requirements. One nice thing Microsoft did with this release was put all of the data entry right at the beginning, so you can actually get up and walk away from your computer for about half an hour. This contrasts sharply with Windows 95, 98, and NT 4.0, where you basically have to baby-sit the installation.
Note that the XP Home and Pro Setup procedure is subtly different. I'll make it obvious when certain steps are for Pro- or Home-only.
Post-installation tasks
Once Windows XP is installed, it's time to perform a few post-installation tasks:
1. Immediately run Windows Update to bring sure your system is up-to-date. There are already many updates available for Windows XP on Windows Update, so you should visit this site right away (it's found in Help & Support, or you can click the icon in Start -> All Programs). You may need to reboot after certain updates, and some updates will require you to install them individually. Keep installing and rebooting until you've got them all. Windows Update includes hardware driver updates, critical system updates, security fixes, application compatibility updates, and other important updates.
2. Test your hardware devices. Once you've bled Windows Update dry, make sure all of your hardware works. Open up Device Manager (Open the Start menu, right-click My Computer, choose Properties, then go to the Hardware Tab and click Device Manager) and make sure all of your hardware was detected and has working drivers. If any do not--as evidenced by a yellow bang next to the hardware device's name, right-click and choose Update Driver. This will launch the Hardware Update Wizard. The first time around, ensure the XP CD-ROM is still in the drive, and try the option titled Install the software automatically (Recommended). If this doesn't work, visit the hardware maker's site and see if there is an updated XP-compatible driver. If this fails, open up Help and Support and navigate to the Fixing a problem link under Pick a Help Topic. There, you will find further help about solving hardware and system device problems.
Note that XP will properly function with hardware drivers designed for Windows 2000, but not those for Windows 9x/Me. If a hardware maker offers a 2000 driver, you should be able to use that, with rare exceptions. XP will warn you that such drivers are unsigned, but it's acceptable to use 2000 drivers.
3. Set up your users. For reasons best left to the imagination, Microsoft sets up each user as an Administrator equivalent with no password. This is unacceptable and foolhardy. Launch User Accounts from the Control Panel, and individually select each account and supply a password, change the picture, and, optionally, change the account type. You can select from Computer administrator and Limited account types from this tool, but XP Professional has a more advanced user configuration tool that lets you select other account types, such as Power User, User, and Replicator. In general, it's OK to leave your account as a computer administrator, but you might consider limiting other family members that might access your PC. At the very least, make sure all users have a strong password.
4. Customize the system further. At this point, you might want to configure the wallpaper, screensaver, and other features, especially if these features weren't carried over from your previous Windows version for some reason. Windows XP configuration occurs in a number of places, but some hot-spots include:
Display Properties - Right-click an empty area of the background and choose Properties.5. Defrag your system drive. During installation, your system drive is going to become somewhat fragmented, especially if you didn't format the system drive. To defragment this drive, open My Computer, right-click the drive (typically C:) and choose Properties. Navigate to the Tools tab and select Defragment Now.
Performance options - Right-click My Computer, choose Properties, and navigate to the Advanced tab. Click the Settings button under Performance.
Control Panel - configure hardware, networking, installed applications, and other XP features.
6.. Install and run your software. Check to see that your software programs install and work as they did on your previous OS. If any do not, open up Help and Support and navigate to the Fixing a problem link under Pick a Help Topic. There, you will find help about solving application and software problems. Also, check the Program Compatibility Wizard in Start -> All Programs -> Accessories for tips on getting programs working under XP. I discuss application compatibility issues further in my showcase, Windows XP Hardware and Software Compatibility.
Note that certain classes of applications cannot be moved from Windows 9x to XP. These include disk utilities, such as Norton Utilities, virus software and the like. XP will notify you if you attempt to install an incompatible application.
7. Set up Automatic Updates. Eventually, you will be prompted to set up the Automatic Updates ("Auto Update") feature. It is critical that you do so: Auto Update will download critical security updates automatically, in the background, and then alert you to install them by default. I strongly recommend letting XP set up this feature. Optionally, however, you can choose to be notified before updates are downloaded, or turn off this feature all together.
So it is done for more info or buy pc goto
http://www.urmicomputers.co.cc
buy a pc


कोई टिप्पणी नहीं:
एक टिप्पणी भेजें